Practical advice
How to clean and disinfect bird feeders
A simple step-by-step routine for washing, disinfecting and drying a bird feeder safely.
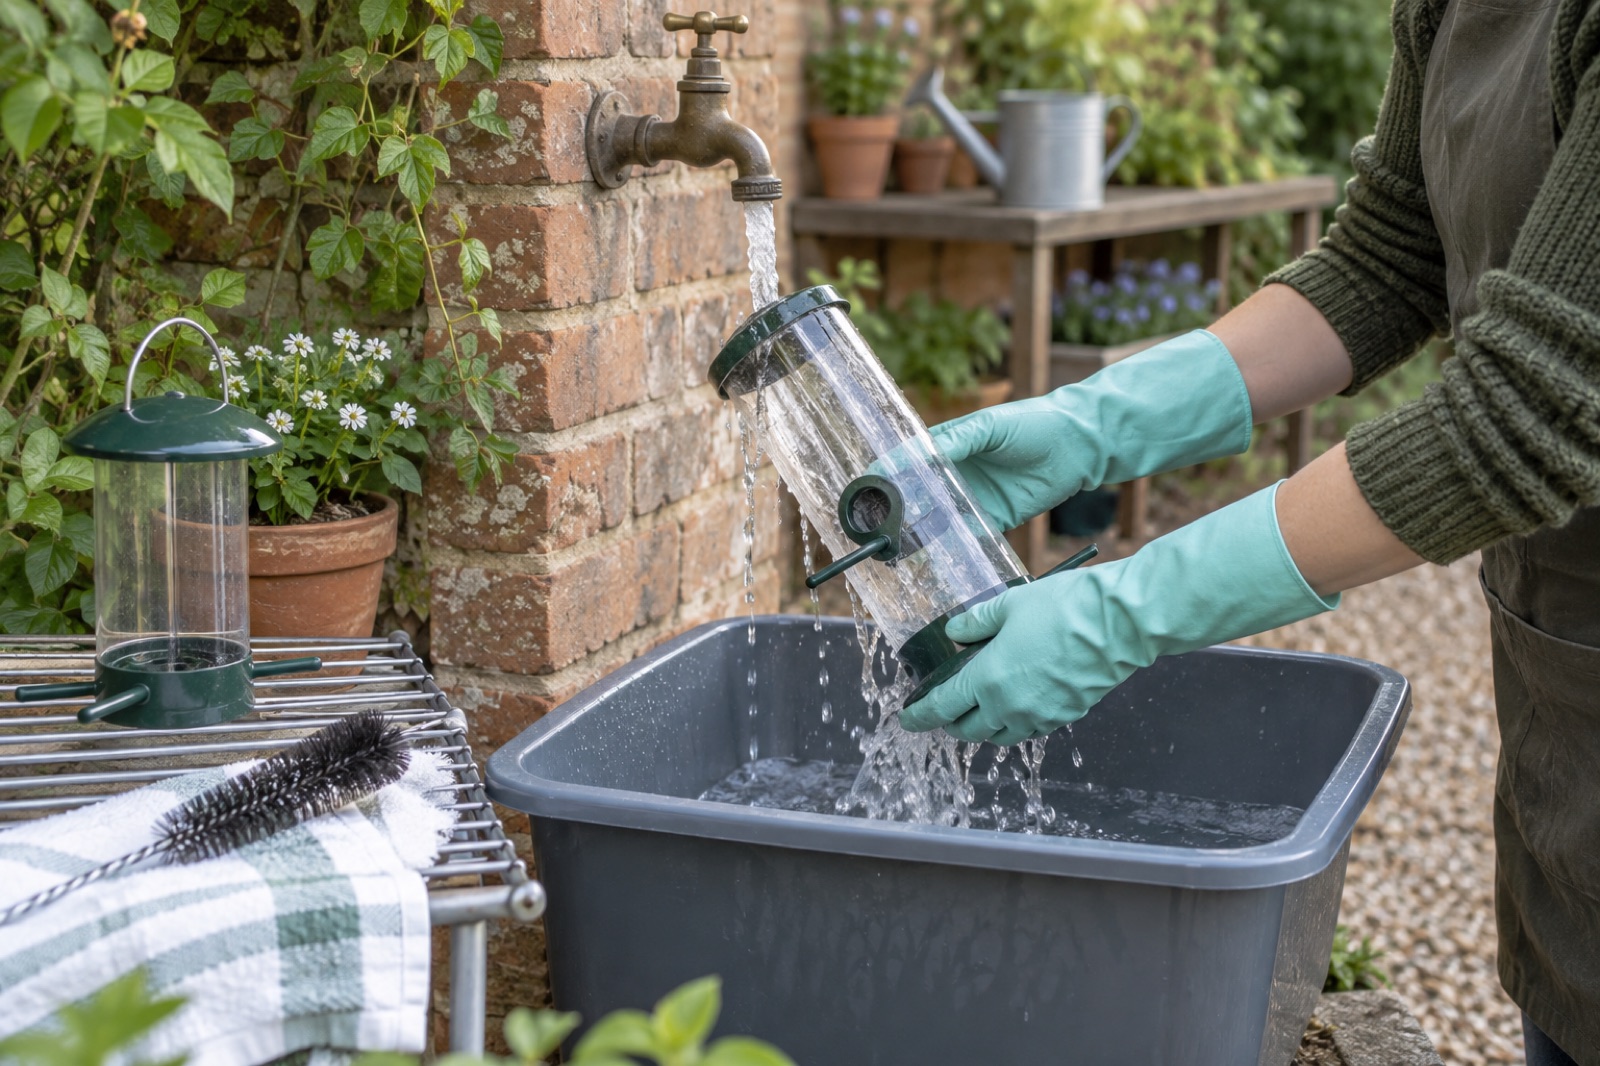
Clean outdoors with dedicated brushes and waterproof gloves.
Remove dirt before disinfecting, then rinse every part thoroughly.
Stop feeding and check current guidance if you see sick or dead birds.
A clean-looking tube is not always a clean feeder. Old food and moisture collect around ports, beneath bases and inside threads, so a proper clean means taking the feeder apart rather than giving the outside a quick wipe.
The RSPB currently recommends cleaning feeders at least weekly. Its healthy-feeding guidance also advises offering only small amounts of food and keeping it as dry as possible. The BTO hygiene guide explains why washing must happen before disinfection.
What you will need
- Waterproof household gloves
- A bucket or washing tub reserved for outdoor bird equipment
- Hot soapy water
- A bottle brush and a smaller brush for ports and seams
- An animal-safe disinfectant and its instructions
- Fresh water for rinsing
- A clean outdoor place where the dismantled parts can air-dry
Do the job outside and away from kitchen sinks or food-preparation areas. Keep the brushes, bucket and cloths for bird equipment only.
How to clean a bird feeder step by step
1. Empty the feeder
Put on gloves and tip all remaining food into an outdoor household bin. Do not reuse or compost it. Damp, musty, mouldy or pest-contaminated food should never be separated from the apparently good part and put back out.
2. Take it apart
Remove every part the manufacturer intends you to remove: usually the lid, base, tube, ports, perches and any guard or shroud. Keep small pins and clips somewhere safe. If you are unsure how it goes back together, take a quick photo before dismantling it.
Pay particular attention to the lowest part of the feeder. This is where damp husks and compacted fragments often sit out of sight.
3. Wash away dirt and old food
Brush off loose material, then scrub every surface in hot soapy water. Use the bottle brush inside tubes and the smaller brush around ports, drainage holes, threads and joins.
This washing stage matters because dirt can reduce the effectiveness of a disinfectant. Do not rely on disinfectant to clean through a layer of seed residue.
4. Disinfect it
Apply an animal-safe disinfectant at the dilution and contact time shown on its label. The RSPB and BTO also identify a weak domestic bleach solution as an alternative, but bleach products vary: follow the current wildlife guidance and the product label rather than guessing a dilution. Never mix bleach with another cleaner.
5. Rinse thoroughly
Use fresh water to remove all detergent and disinfectant. Flush narrow openings, hollow sections and screw threads as well as the obvious surfaces. If a part is too enclosed to rinse properly, it will also be difficult to keep hygienic in normal use.
6. Let every part dry
Leave the dismantled pieces outside to air-dry completely. A towel may remove visible droplets, but water can remain inside a base or around a port. Reassembling too soon puts fresh food straight back into a damp feeder.
7. Clean the surrounding area
Clear away old food, husks and droppings beneath the station. Wipe down poles, hooks and guards where birds make contact. The RSPB recommends moving feeding positions regularly and, where possible, using several smaller stations rather than concentrating many birds in one place.
Finish by cleaning the brushes and bucket, removing your gloves carefully, and washing your hands and forearms with soap and water.
Before you refill
Check that the feeder is dry, securely reassembled and free from cracks, sharp edges or sticking mechanisms. Add only the amount likely to be eaten within one or two days instead of filling a large reservoir to the top.
Current RSPB guidance recommends offering seeds and peanuts only from the beginning of November to the end of April. Check the live guidance before refilling, particularly if local disease advice has changed.
If you see a sick or dead bird
Stop feeding, empty bird baths and consult current RSPB or BTO disease guidance. Do not simply clean the feeder and return it immediately. The recommended pause varies between official sources and can change with the situation, so use their current advice before restarting.
Report suspected garden-wildlife disease through the route given by the RSPB or BTO. Avoid handling a sick or dead bird with bare hands.
Common cleaning mistakes
Only rinsing the feeder
Running water removes loose material but does not replace dismantling, washing and appropriate disinfection.
Topping up instead of emptying
Fresh seed can hide an older damp layer at the bottom. Empty the feeder fully before each refill.
Forgetting moving parts
Weight-operated shrouds, springs and sliding ports can jam when fragments collect around them. Check that the mechanism moves freely after cleaning.
Reassembling while damp
Moisture trapped beneath a base can spoil a new fill quickly. Leave enough time for air-drying rather than rushing the feeder back outside.
How to make weekly cleaning easier
Keep the gloves, brushes and disinfectant together in a labelled box. A feeder with a removable base and accessible ports will be easier to maintain than one with sealed corners or complicated decorative parts. Our guide to easy-clean bird feeders explains which design features make the biggest difference.
For help with timing, read how often to clean bird feeders. If rain is the recurring problem, use our guide to keeping bird seed dry.
Helpful products
A practical feeder-cleaning kit
These two items cover the awkward parts of the job—a long brush for the inside of feeder tubes and a purpose-made cleaner for the washable components. Keep both with your outdoor-only cleaning equipment.
Jacobi Jayne long bird feeder cleaning brush
Best for: Reaching along tube feeders and other narrow reservoirs
A long-handled natural-bristle brush made for reaching inside bottle-shaped and tubular bird feeders.
What stands out
- 57cm overall length
- Made specifically for bottles and bird feeders
- Loop for hanging with outdoor cleaning equipment
Keep in mind
- Keep it solely for outdoor bird equipment
- 57cm long
- Natural bristles
- Long handle
Inspired Bird Feeder Cleaner and Sanitiser
Best for: Routine washing of feeders, bowls and feeding-station parts
A ready-to-use 500ml trigger spray sold specifically for cleaning feeders, bowls and feeding-station equipment.
What stands out
- Sold specifically for bird-feeding equipment
- Ready-to-use trigger spray
- 500ml bottle
Keep in mind
- Follow the label exactly and rinse every part thoroughly
- 500ml
- Trigger spray
- For feeding equipment